
You’ve been streaming every day for what feels like an eternity.
You’ve invested time, effort, and money into this passion project, and still—a discouragingly low view count stares back at you on stream.
Why is this happening?
You’ve seen plenty of streamers put in much less effort for a much higher view count.
You know you can be just as successful, you’re just not sure what you’re doing wrong. You need a guidebook.
Today, I’m going to walk you through 35 proven tips to help you get more viewers on Twitch.
Being a streamer myself, I’ve experienced it all: the empty chats, the low view counts, the frustration of watching other streamers with less passion surpass you in followers and subs.
But what if I told you that your Twitch dreams were well within your grasp?
How to Get More Viewers on Twitch: 35 Tips for Before, During, and After Your Stream
In this guide, we’ll start with the basics (if you’ve been streaming for a while, you may find it more beneficial to skip to the “during” or “after” your stream sections), and then progress to more advanced strategies and tips.
Let’s start with a few things you can do before you go live.
Before You Start Your Stream

1. Pick Your Game/Topic
The consensus among streamers is this: when choosing which game to play on stream, you’ll want to pick one with a fairly high view count, but low streamer count.
In other words, games that have a large following but a small number of streamers playing the game.
In doing so, you’ll be able to garner attention from the game’s popularity, but you won’t be competing with bigger streamers for views. It’s a solid strategy.
Still, you’ll want to make sure you have a decent knowledge of the game you’re playing. Skill is important too.
It’s not as entertaining to watch a streamer lose over and over again (unless your commentary is top-notch).
You can check out Twitch Tracker to determine which games may be right for you.
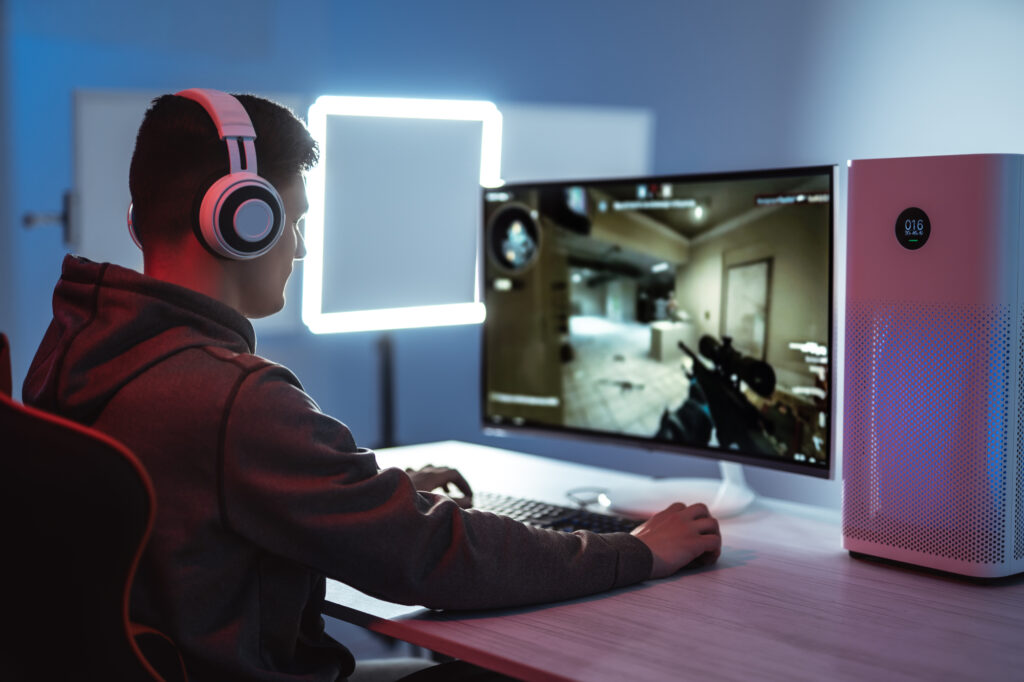
2. Streaming Quality
If you’re experiencing glitchy visuals, interruptions, or crashes, it’s likely a connection or computer processing issue.
It’s also something you’ll want to nip in the bud…viewers won’t want to stick around for a laggy stream.
If you don’t have a solid set-up yet, make sure to keep a close eye on Twitch Studio during your stream. Here are a few numbers to keep an eye on:
CPU
Your CPU (central processing unit) % will depend on the game you’re playing. A good rule of thumb is 10% to 30% for less demanding games, and 70% or less for demanding ones.
This may also fluctuate based on your computer (Macs typically run a higher CPU than PCs). If your CPU is spiking, it might be the cause of slow or frozen gameplay.
Frame Drops (FPS)
Frame Drops are an indication that your computer is struggling to keep up with the graphics in your game.
Ideally, you’ll want 0 frame drops during a stream. If you’re noticing consistent frame drops, you may want to adjust your bitrate (we’ll touch on this later).
Slow Frames
Unlike frame drops, slow frames typically represent an issue with the server you’re playing on, not the capabilities of your computer. Still, 0 slow frames are ideal for your stream.
Now that we’ve gone over what might be causing your quality issues, let’s take a look at a few quick solutions.
Ethernet Cables
Let’s say your streaming room is far away from your router. Maybe you just don’t live in a location with an ideal Internet connection.
Whatever the case, consider picking up an ethernet cable to improve your connection during streams.
Game Choice
Sadly, if you don’t have access to the proper streaming equipment, you may not be able to play games that require more from your computer.
Try streaming a game with less intense graphics or gameplay.
Two Monitors
You might consider purchasing another monitor for streaming.
This way, you won’t overload your computer, and you can utilize one monitor for gameplay and one for reading chat/Twitch Studio.
Streaming Device
Maybe the issue is your streaming device. I streamed from a MacBook Pro when I first started, and, it was a pain every time. Consider purchasing a PC for streaming.
3. Streaming Settings
You’ll want to make sure you’re running the correct streaming settings for the best quality.
Ideally, you’ll stream in 1080p with 60 fps, but you might also need to sacrifice a bit of quality for a smoother stream.
Here’s a quick breakdown of what your OBS settings should look like (with a couple of different quality options):
| Resolution | Bitrate | Framerate | Encoder | |
| 1080p 60 fps | 1920×1080 | 6000 kbps | 50-60 fps | x264 |
| 1080p 30 fps | 1920×1080 | 4500 kbps | 25-30 fps | x264 |
4. Mic/Audio
You’ll want to invest in a decent mic for your streams.
If your audio is faint, glitchy, or echoey, it could prevent viewers from watching.
And if you’re creating highlights or edits from your streams to share on socials, you won’t want choppy audio messing with the quality.
Here are a few solid (but affordable) mics for your consideration:
You’ll also want to think about the audio in the room you’re streaming in. Soundproof is best, but if you’re on a budget, consider carpeted rooms to avoid an echo.
Or, you can put down a few blankets to help deaden the sound.
5. Webcam
Contrary to popular belief, there are advantages and disadvantages to using a webcam.
If you’re uncomfortable in front of a camera, for instance, you might find your streams are less awkward without one.
Or maybe you’re holding off on a webcam to advertise a face reveal.
On the other hand, webcams can help you connect with your audience. It enables you to be more authentic.
If viewers feel like they’re right there with you during the stream, they might feel more inclined to stick around and hang out.
Whatever the case, if you do decide to use a webcam, you’ll want a quality one. Consider these options:
- Logitech Stream Cam
- Elgato Facecam
- Logitech HD Portable
- iPhone: If you’re on a budget, you can use your phone as a webcam! Just head over to the app store and download EpocCam.
Additionally, you can set up a green screen by using a webcam. This can be useful if you’re looking to display fun backgrounds—another engaging device to draw viewers in.
6. Lighting
If you do decide to use a webcam, the next step is to make sure you’re well-lit on camera.
Just like with your audio and gaming visuals, you’ll want to strive for the best quality you can achieve to encourage viewers to stick around.
Let’s go over a few essentials:
- Key Light: Your key light will be your primary source of light. Where your ring light helps with big picture lighting, your key light will highlight you with form and dimension.
- Ring Light: A ring light is the first light you’ll want to invest in—it provides soft lighting with little shadow. Amazon has plenty of affordable options.
But that’s assuming you have the budget to afford professional lighting. If you’re in a pinch, use what you have access to: a desk lamp, LED lights, or even a window.
Just keep your source of light in front of you to avoid being back-lit.
7. Royalty-Free Music
It’s best to avoid silence on stream when possible.
You’ll ideally provide fun commentary for your viewers on stream, but even the most experienced streamers can’t expect to fill every second with it.
Since Twitch has strict rules against copyrighted music, the safest option is to shoot for royalty-free music from Spotify or YouTube.
Just search “royalty-free music” or “streaming music,” and you’ll be able to find plenty of catchy playlists.
(Note: if you don’t have YouTube/Spotify premium, be wary of ads. They’ll catch you off guard at the worst moment.)
You can also utilize music at the start and end of your streams. While you’re waiting for viewers to file in/out, it can help to keep up the view count.
8. Overlay
I know when I first started streaming, I certainly didn’t think there was much of a point in fancy overlays. I was a gamer after all—not a graphic designer.
I’ll implore you now to invest time in creating overlays. There are plenty of practical uses:
- Starting Soon
- Ending Soon
- Just Chatting
- Taking a Break
- Transitional Overlays
They’ll give your stream a cleaner/more entertaining feel for your viewers. They’re also a good branding tool: you can incorporate your color theme and logos, and they’ll help you become more recognizable.
But where can you create them?
Here are a few software recommendations (both paid and free):
Once you’re happy with your overlays, you can use your streaming software to incorporate them into your main layout.
9. Streaming Software
The right streaming software has the potential to increase the overall quality/functionality of your streams.
Unfortunately, there are a lot to choose from, and it all depends on the computer/PC you’re using. You might also consider pricing, features, and useability…there are a lot of factors.
Here are a few of the most popular choices (but I’ll encourage you to do your own research to find the right fit):
You might experiment with a couple free trials before landing on a streaming software. The most important factor is that your streaming software is the easiest for you to use.
10. Twitch Bio
Now for a fairly straightforward tip: twitch bios.
This is important for newcomers on your channel: it tells them who you are, advertises your socials, and allows them to donate to you.
There are also some fun Twitch Panels you can incorporate.
Here’s a checklist of the essentials:
- About Me: Include what you stream, what you play, who you are—anything you’re comfortable sharing that can help potential followers connect with your brand.
- Donate: Make sure you enable donations so you can start getting paid!
- Socials: It’s a good idea to include your socials in your bio so they can all start to feed into each other.
- Discord: You can also include a link that prompts users to join your Discord community! This is a great way to build members and direct viewers back to your channel when you go live.
Though a Twitch Bio isn’t necessarily important while streaming (other than donating), it adds to the professionalism of your channel.
Viewers might be prompted to stick around if your about section is clean and well-established.
11. Chat/Community Rules
No one wants to be a part of a community that feels hostile or unwelcoming. Chat rules foster a safe environment that can get more Twitch viewers to stick around.
And as the host of your stream, it falls upon you (and your mods), to create a set of guidelines that ensure a protected environment.
You’ll want to spend some time reflecting on the specific rules you want for your chat, but here are a few ideas to get you started:
- No hate speech
- No spamming
- No trolling
- No discrimination
12. Bots
Bots are a great tool to get more viewers on Twitch. If you haven’t hired any moderators yet, they can help with up-keep/tend to the more mundane tasks during a stream.
If you’re smaller and don’t generate a large view count, bots can say hi to new viewers in the chat.
They can also remind viewers of the chat rules, post links, and mute/kick viewers if they violate your guidelines.
They’re essentially the security of your community.
And there are a lot to choose from. Here are some of the most popular:
13. Mods
Aside from bots, you’ll also want to consider hiring a few mods to help your stream run smoothly.
If you’re a smaller streamer, you’ll only need one or two—you can judge how many more you need as your chat becomes more active.
But where can I find mods?
When I started streaming, I recruited a couple of loyal friends to help. To grant them “mod” permissions, just go to your dashboard on Twitch, select “Community,” then “Roles Manager,” and “Add New.”
You can type in the desired username and make them a mod.
You can also check Discord for moderators. There are almost always people who are looking for moderator experiences in Discord communities, so try asking around.
And if you already have a Discord, you can offer mod applications there.
Note: I use the word “hire” a lot when referring to mods…it’s not required that you pay them, but if you aren’t going to, make sure you establish that beforehand.
14. Enable VODS
New viewers might want a preview of your content before they commit to a follow: this is where VODS come in.
VODS (or Videos on Demand) are recordings of your streams that appear on your profile under “Recent Broadcasts.” To turn them on, head to your Creator Dashboard → Settings → Stream → VOD Settings → Store Past Broadcasts.
You’ll also want to make sure VODS are enabled so you can pull content from them later.
They can be useful for creating stream highlights, or promotional material for your channel on other platforms.
15. Discord
Discord isn’t exclusively necessary for streaming, but it’s a great place to build your community, notify fans when you go live (which helps your view count!), and establish a platform in the streaming community.
I found Discord to be the most rewarding part of my streaming experience. There are so many ways to connect with your community that Twitch doesn’t allow for: channels, podcasts, rewards, etc.
Discord really needs a guide of its own. But here are the basics you’ll need to get your discord up and running:
- #Channels
- #Community Rules
- #Voice Channels
- #Go Live Notifs
- #General
- #Fan-Art
- #Memes
- #Community
- #Announcements
- #Welcome Mat
You can also set up audio on Discord if you’re streaming with others.
You’ll have to download Blackhole if you’re streaming on a Mac, but their website includes a fairly simple set-up guide for Discord audio.
16. Best Streaming Times/Days
You’ll want to do a bit of research to figure out the best time(s) to stream in your area.
There are certain hours when more users are active on Twitch, which might increase your chances of a higher view count during your stream.
The general idea, however, is to stream during the less popular hours. This way, you aren’t competing with big streamers who bring in lots of viewers.
The peak viewing hours are between 11:00 AM – 11:00 PM. This means you’ll want to stream between midnight and 10:00 AM PST.
17. Go Live Notifications
You can set up custom “go live” notifications when you start streaming on Twitch.
This is important for two reasons: your followers will be notified every time you go live, and if you set up a custom notification, you can create engaging captions that prompt viewers to join.
You also have the ability to set up live notifications on your Discord.
There are a few different ways to do this, but the easiest is by downloading the MEE6 bot and following the instructions on their website.
18. Content Planner
This doesn’t have to be a fancy spreadsheet—it could be as simple as a list of ideas you want to try on your channel.
Regardless, you’ll want to have plenty of content planned out. Beginner streamers are often advised to go live once a day (at least).
Hootsuite has a pretty good content calendar (and it’s free!).
19. Other Socials
Unfortunately, Twitch doesn’t have the best algorithm for organic growth.
It’s possible to blow up from Twitch alone, but you’ll probably want to consider running other socials for additional help.
Consider Instagram, Twitter, YouTube, or TikTok (or a combination of them).
My recommendation is Tik Tok—its algorithm is the simplest to navigate—but you may find it beneficial to advertise on other platforms too.
We’ll talk about more targeted strategies for social media below. For now, just know that it’s a great idea to feed your socials into one another.
Make sure you’re advertising all of your links to achieve the highest engagement across platforms.
During Your Stream
It’s important to fully prepare before a stream. Streamers that go live with a plan are often more confident, smooth, and entertaining. But there are also several boxes to check during a stream. Let’s start with the basics:
20. Twitch Affiliate
Twitch Affiliate is a program that allows selected streamers to monetize their channel. There are other bonuses, too—custom badges, emotes, channel points, etc.
These tools allow you to specialize your platform and make it more engaging for your viewers. We’ll look at each of them in more detail below, but first, let’s talk about how to get affiliated:
- 50 followers: The first qualification is 50 followers. Every follow counts, so reach out to as many people as possible—family, friends, social media followers, etc.
- 7 unique broadcast days over the last 30 days: Twitch wants to make sure you’ll be an active streamer. To prove it, you’ll need to have streamed once every day for 30 days before applying for an affiliate.
- 500 minutes of broadcasting over the last 30 days: You’ll need to have streamed for at least 8 hours 30 days before applying for the program.
- An average of 3 or more viewers: Lastly, you’ll need to have an average of 3 concurrent viewers. Make sure you’re only streaming when people are watching: if your view count is below 3 for an extended period of time, it can affect your average.
Twitch Affiliate should be the first milestone you work towards as a streamer. Not only will it provide the tools to help you get more viewers, but you’ll be able to get paid through donations, subscribers, and ads.
Additionally, most of the tips in this section rely on unlocking Twitch Affiliate first.
21. Engage Viewers
You’ll always have “lurker” viewers that aren’t super invested in your streams.
Maybe they’re playing it in the background while they do another task, or just forgot to close out the tab they were watching you on.
The majority of your viewers, however, will want to be engaged.
Take a break every once in a while to acknowledge them. Run a poll, host a contest, or play a multiplayer game that your viewers can join.
Imagine how you’d feel if you had the opportunity to game with your favorite streamer. Even if they didn’t get to you, you’d stick around just for the chance that they might.
We’re trying to create an incentive that compels viewers to watch your streams for as long as possible.
22. Interact With Viewers
Take the time to interact with your viewers as well as engage them.
Once you reach a certain threshold of followers, it’ll become more and more impossible to acknowledge every viewer that joins your stream.
Now is the perfect time to form solid viewer/streamer acquaintances.
Pay attention to the chat as viewers join—call them out by username, ask them questions, greet your regulars.
I’ll once again draw on the scenario of your favorite streamer taking the time to acknowledge you.
The more personable your channel becomes, the more it’ll encourage viewers to join just for the chance of interacting with you.
23. Fun Titles/Notifications
You have the opportunity to customize the title (and the “Go Live” notification) of your streams.
It may seem inconsequential, but creative titles give viewers more incentive to join.
You’ll still want to include what you’re doing/the game you’re playing, but consider making the rest of your title weird, random, or funny.
24. Talk, Talk, Talk
You’ll want to avoid dead space when streaming. Attention spans are shorter than ever, so if there’s a lag in content (gameplay, commentary, or otherwise) you might start to lose viewers.
Try a stream of consciousness if you have trouble finding things to say. Talk about your day, your gameplay, or a random topic that comes to mind. More often than not, something will eventually be said in chat that you can piggyback from.
25. Energy
No viewer wants to watch a completely dead/monotone stream. Maybe your style isn’t happy-go-lucky or bouncing off the walls, and that’s okay!
But you’ll still want to maintain a welcoming, upbeat energy throughout your stream.
And if you’re someone who does have naturally high energy, play into that. Turn your streaming environment into one you would want to watch as a viewer.
26. Intros & Outros
There are some important strategies behind intros/outros that can maximize your view count:
At the beginning of your streams, leave your “starting soon” overlay up for a few minutes before you switch to gameplay/commentary.
This will ensure you have a fair amount of viewers in chat to work with before your stream officially starts. However:
- Don’t wait too long—viewers will get bored and leave. 5-7 minutes is a good range.
- Play music while you’re waiting to avoid silence.
- Unmute occasionally to read comments or remind viewers that you’ll start soon.
- If you experience any issues early on, this will give you time to fix them.
At the end of your streams, follow the same structure. Switch to a “goodbye” overlay and play some outro music before you end.
27. Network
You’ll want to network in your community just like any other influencer.
Find streamers of similar size in the same niches as you and become active in their streams/chats. It’s also important to network with slightly bigger streamers to expand your channel.
The goal here is to form a mutually beneficial relationship for hosting/raiding, streaming together, and becoming active in each others’ communities.
All of these activities will introduce your channels to new viewers and expand your streaming groups.
28. Hosting/Raiding
Let’s say you’ve successfully networked within your niche and gained a couple of friends to steam with.
If you’re streaming at the same time, make sure you raid them at the end of your stream. To do so, just type “/raid [username]” into your chat. A link will be sent to your viewers encouraging them to join the new stream.
It’s also important to raid streamers you don’t know.
They might occasionally raid you back and significantly increase your view count. You have nothing to lose by raiding another streamer, so aim high with bigger streamers.
You can also host a channel on Twitch. This can be done offline, so just type “/host [username]” into your chat, and their stream will be shown on your channel while you’re away.
Apart from a courtesy to friends, this is another great networking tool that can expand your network with other streamers.
29. Squad Streams
Another great promotional tool is squad streaming.
Grab a couple of friends and head over to your stream manager, then click “quick actions,” “add a channel,” and type in the usernames of the streamers you want to invite.
You can do this with up to 3 other streamers. It’s a great way to combine audiences and share viewers—especially if some of you are smaller/larger. Just make sure you all have a good rapport with each other.
You might also consider promoting the stream in advance on each of your socials. Let viewers know when and where (whose channel) this stream is taking place for the maximum view count.
30. Event Streams
Similar to group streams, these are the kind of streams you’ll want to promote in advance to incentivize views.
Let viewers know what you’re doing and when it’s happening so they can mark their calendars.
Here are a few ideas for event streams:
- Milestone Streams: Celebrate a sub-goal, donation, or becoming an affiliate/partner. This is a great way to thank your viewers for their participation on your channel.
- Challenges: These can be as tame or wild as you want them to be. Play a game with increased difficulty, on a time limit, or add a punishment for yourself if you fail.
- Face Reveal: This idea won’t apply to everyone, but if you’ve chosen to remain faceless, consider promoting a face reveal. This can be a great marketing strategy which we’ll discuss more in detail below.
31. Badges/Emotes
This is the time to recruit your artist friends if you have them. Once you become a Twitch Affiliate, you’ll want to customize your emotes and badges for your viewers.
They’ll help to make your streams more unique for your viewers.
As a bonus, you can create emotes that can only be unlocked through a subscription/follow to convert new viewers to long-term viewers.
32. Channel Points
Channel Points are allotted to viewers the longer they’re on your stream. If you’re a Twitch Affiliate, you can create custom rewards for viewers when they redeem their channel points.
The better your rewards, the longer viewers might stick around to reap those points.
Have trouble coming up with unique rewards? Try these:
- Hydrate
- Viewer picks the music
- Viewer can make you do something stupid (die, start over, etc.)
After Your Stream
You’ve finally finished your stream. Phew! But your work isn’t done yet. There’s plenty of marketing that happens after you go live that’s just as important to get more viewers on Twitch.
33. Decide on Your Brand
It’s important to have a recognizable brand so that viewers can identify your content.
Not only will it distinguish you from other streamers, but sporting a consistent theme will make you appear more professional.
The goal with branding—even from the start—is to look like a famous streamer before you are one.
A few tips to start building your theme:
- Color Theme: You’ll want to use the same colors for all of your design assets (overlays, emotes, social media, avatar, etc.).
- Unique Sayings/Phrases: This will happen organically during your streams, but you might find that you create/resort to a phrase that’s unique to your streams. This can be a great marketing tool for future merch/an inside joke between you and your audience.
- Editing Style: You might decide to hire an outside editor, and that’s okay! But you’ll want to develop a consistent editing style for highlights, promos, or any other social videos you take part in.
- Streaming Style: Obviously, your streams won’t be the same every time. But it’s important to consider what you’d like to be known for. Are you the class clown of streamers? The hardcore streamer? Are your streams light-hearted or do they take on a more serious tone?
34. TikTok
Unfortunately, Twitch doesn’t have an algorithm that allows for much organic growth.
This means you’ll probably want to resort to other platforms to get more Twitch viewers.
I’ve had the most success with TikTok’s algorithm. You could try promoting video content on YouTube and Twitter, but you’ll probably run into most of the same roadblocks as you do with Twitch.
With Tik Tok, you have two main content options:
- Stream Highlights: Use your VODS to select funny, cool, or powerful moments from your streams and edit them into a 30-60 second video for TikTok.
- Original Content: Create content separate from your Twitch and use that traction to push viewers towards your Twitch Channel.
You’ll want to post as frequently as possible on TikTok (every day if you can). The more often you post, the more exposure you give your content to new audiences. It’s a great way to connect with viewers you can’t reach on Twitch.
35. Editing Software
If you do promote your content on another platform, you’ll need to learn how to use editing software.
There’s a lot that goes into content editing: gaming captions, audio editing, jumpcuts, etc., so you’ll need a good program to produce the best content.
My recommendations are PremierePro and FinalCut Pro. They are a bit of an investment—$20.99 a month and $299.99 respectively—but you’ll find that they’re the easiest to use when editing down longer videos.
Note: If you’re on a budget, iMovie is a completely free option.
Conclusion
Remember: there’s no formula for Twitch streaming.
What works for one streamer might not work for you, and what works for you may not work for anyone else.
The key is trial and error, over and over again until you find the right combination of tips that work for you.
Passion alone will take you a long way. Keep at it, don’t give up, and don’t be afraid to break the mold. The most successful streamers are the ones who find unique ways to make an impact.
Savannah Sellers is a content creator who started a successful Twitch stream and TikTok channel from scratch as a personal project under the name flarity_.